Truck Tires Chain Reviews

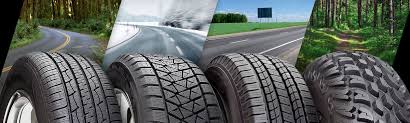
Types of Truck Tires

When you’re looking for truck tires, there are many options to choose from depending on your region’s climate, the kind of driving you like to do, and other variables. While your local AutoNation service center can help you find the perfect tire for you, this handy guide can get you started down the road to understanding truck or SUV tires!

If your vehicle is all-wheel drive or a 4×4, then you’ll want to keep the tires the same on all four wheels. However, if you own a single-axle drive vehicle (such as front- or rear-wheel drive) then you can differ tire size, tread, and type between wheels on the front or rear axle, though both tires on the same axle should be the same.

“Truck” Tires

Truck tires can be used on a truck, SUV, or CUV. While offering some heavy-duty or off-road capability, truck tires do come with improved handling, ride, and noise capabilities over off-road, all-terrain, or mud tires.

Truck tires are for truck, SUV, or CUV owners who do more street or highway driving than off-roading, and are good for most climate conditions, as many are all-season tires, too.

Off-Road

Off-Road tires offer supreme performance on sand, gravel, mud, and rocky terrains. They offer larger and deeper sipes (treads) so that they can grip and obtain maximum traction on uneven surfaces. However, off-road tires are much noisier on roads and can have very poor ride quality at highway speeds.

Off-road tires are for drivers who frequently find themselves without pavement or with rocky terrains in their paths. They were designed for uneven or unpaved terrains, include improved puncture resistance, and are often all-season, but aren’t great on the paved bits between home and adventuring.

All-Terrain

All-terrain tires offer the best of touring and off-road tires. They are quieter and more smooth on highways or paved surfaces than off-road tires and are better at handling wet, rocky, muddy, or sandy situations than normal truck tires. Just as with all-season tires for cars, all-terrain tires are good any time of year and on most driving surfaces.

If you enjoy equal parts off-road and paved surfaces, then the all-terrain tire is for you. It offers a happy balance of off-road tire capability while ensuring paved surfaces aren’t a nightmare.

Mud Tires

Mud tires have wider and deeper treat gaps and blocks, offering more space for mud or uneven surfaces to squeeze through. The squeeze and release of debris, such as sand, mud, or rocks, ensures that drivers leave the dirty stuff on the road and not clinging into the tire’s treads. The narrow blocks and gaps on all-season or all-terrain tires may not release clumps of mud or rocks as easily, decreasing traction on uneven surfaces.

Mud tires are for drivers that often see uneven and unpaved road surfaces, but don’t need rock-crawling performance. These tires will offer some protection against punctures, but will be worse on paved surfaces than all-terrain or truck tires.

Winter Tires

Similarly to car tires, winter truck tires offer improved performance in snowy or icy conditions over all-terrain tires. They offer softer rubber that won’t freeze in the cold, have improved traction on snow, and can even come with studs for griping icy roads.

Winter tires are for drivers that face extreme winter weather, such as long-term or heavy snow and ice. For convenience, it’s easiest to have a spare set of wheel rims for each set of tires, such as one wheel set for all-terrain tires and one wheel set for winter tires.

Heavy Duty Tires

If you’re the kind of truck, SUV, or CUV owner that likes to haul trailers or max-out the payload capacity of your vehicle, then heavy duty tires are for you. These tires offer commercial vehicle reliability for everyday driving.

Heavy duty tires are for the CUV, Truck, or SUV owner who works commercially. They offer supreme durability and longevity, and are capable on highways or on the job site.

The differences of Passenger and Light Truck rated tires

When we look at the load rating the tire is very safe as we have exceeded the requirments.  Now some people may want to call me an idiot as I have installed a lower speed rating on my truck from factory, please don’t stop reading now.  This definitely can be a concern for a tire shop by taking on this liability, in fact most tire shops will tell you they won’t install this tire on your truck.

Please find below a summary and more details on the differences of Passenger and Light Truck rated tires;

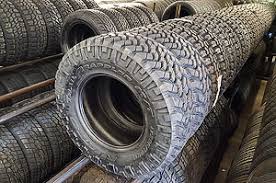
1. P tires refer to Passenger tires and LT refers to Light Truck tires.

LT tires are constructed of more tread ply’s.  Tread ply’s are the layers of material found inside of the tire(see featured image)  LT tires are made with tread ply’s of 6(C), 8(D),10(E) or 12(F).  P tires only have a 4(B) ply load range. 

2. P rated tires are lighter weight when compared to LT tires.

The extra rotational weight also steals more power from the engine for acceleration and will increase the length of your emergency stops.  If economy or vehicle performance is high on your list P rated is the best option.  In a comparison of the General Grabber AT2 tire, the P rated tire is 41.7 lbs when the LT(10 ply) rated tire is 48.5 lbs. 

 3. P rated tires offer a smoother ride quality and better bump absorption.

Feel the small cracks and bumps on road way more with LT rated tires.  Please note LT tires usually run higher tire pressures which can also be a factor of this feedback.  If smooth ride is high on your list P rated is the best option. 

 4. LT tires are stronger when compared to the P rated tires.

Due to the tire having more tread ply’s and in some cases even more sidewall tread ply’s you can get higher load ratings and more tire durability.  I primarily use LT rated tires because I carry a lot of weight when overlanding and drive on terrain with jagged rocks and sharp sticks.  If a high load rating or tire resistance to punctures is high on your list LT rated is the best option.

5. LT tires can offer 3 ply sidewalls while all P rated have 2 ply side walls.

A common weak spot of our tires when offroading is the sidewall.  When going with a LT rated tire you can find companies that upgrade from a 2 ply to a 3 ply sidewall, this can help reduce tires punctures.  If resistance to sidewall punctures is high on your list LT rated tires with 3 ply sidewalls are the best option.

6. LT tires are made of more aggressive treads than the P type tires.

This may be a generality but it is very rare to get mud terrain treads in a P rated tire.  All terrain and Hiway tire treads can be found in most cases P and LT rated tires.  However an example like the BFG All Terrain KO2 is only available in LT rated versions.

7. P rated tires have better tread wear warranty

This is a generality, however it is much easier finding a tread wear guarantee from a tire manufacturer when you buy P rated vs LT rated tires.

If you are torn between which is best for you, don’t forget about LT rated 6 ply tires.  These usually come with a 2 ply sidewall and are a nice middle ground between P rated tires and LT rated 10 ply tires.

What to Do if You Witness a Tire Blowout

One of the reasons tire blowouts are so dangerous is because they don’t just affect the truck and the vehicle they collide with. The debris can fly into the path of nearby vehicles, causing secondary accidents. Below are a few tips to keep you safe:

  • Keep your distance. It’s never a good idea to drive too close to a semi-trailer. Beyond the risk of a blowout, you also have to consider other mechanical failures, the truck’s load, and its blind spots. If you can, it’s always best to avoid driving side by side with a large truck. If you are driving behind a large truck, allow plenty of distance.
  • Move over. If you see a tire blowout, move away from the truck as quickly and safely as possible. Do not slam on your brakes or drive into the path of another vehicle. This can cause an accident on its own. If you are behind the truck, slow down in a safe and controlled manner.
  • Buckle up. In the event of an accident, your odds of survival are much higher if you are wearing your seatbelt. No matter how far you drive, or how slow you go, always wear your seatbelt. The NHTSA reports that nearly 10 percent of vehicle occupants do not wear their seatbelts.

Getting Your Home Renovation Ideas Off The Ground

What reality TV shows like The Block and House Rules teach us about renovating

We’ve witnessed the dummy spits, tantrums and blowups on reality renovation TV shows but there are also some great pieces of advice when it comes to home makeovers that we can take away from these shows. Through the contestant’s tears and heartache to renovate an ideal children’s bedroom or a chic bathroom we’ve pulled out 5 key renovation messages.  So when you’re about to get stuck into your own renovations, minimize stress and drama by following these reality TV red hot tips.

Create a Realistic Budget

On these reality renovation shows such as The Block and House Rules it’s usually the production company setting the budget, with contestants then given a set figure to work with to transform the property. Nine times out of ten, the contestants always spend over their budget! Lucky for them though, they have challenges along the way where they are given the opportunity to win more money and vouchers towards their renovations. Clearly this is not the case for you when you overspend on those bathroom tiles, leaving you with just a few hundred dollars to spend on the remaining fittings for the bathroom!

Timing is Everything

In season one of The Block, the contestants were only given 14 weeks to complete their home renovations! That’s not a considerable amount of time for a full home renovation but that’s TV for you and they made it happen. Deadlines and timings is everything when it comes to home renovations, not only so an episode of House Rules can get to air but so all jobs can be completed that have a flow on effect. For example, you need to know how long the bathroom waterproofing will take to be done so you know when to book the tiler in. Or if you’re planning on giving the inside of your house a fresh lacquer of paint before putting it on the market given it plenty of days to dry before the first open house.

The Home

While everyone has their own tastes when it comes to renovating and designing a home, here are a few rules of thumb we’ve learnt from shows like The Block and House Rules.

Changing Trends: It may be cool and hip now to have a black and white striped lounge room but in a few years’ time that fad will look daggy and dated. This is the last thing you want at a critical time when you’re wanting to sell. So instead, decorate with trendy items, as they’re easier to replace once they go out of fashion.

Utilise buildings and natural features: Don’t go knocking down exposed red brick or an old gum tree in the front yard. Work around the properties natural structures. They add character and a unique touch to your home and can work in your favour when it comes to resale.

Matching colours is a no no: On several episodes of these reality TV shows we’ve seen contestants criticised by the judges for mimicking tones in a room. For example, colour coding the print on a bedroom wall with throw cushions on the bed. So take this tip from the judges and don’t match colours, it will save yourself time and stress.

Keep it simple: Less is best! Many contestants seem to head down the path of excess, too many pillows, crowding the wall with paintings or cluttering shelves with knick-knacks just for the sake of it. Minimize for a modern, fresh and bigger looking place.

The Team

There’s no ‘I’ in team! And when it comes to the success of a renovation it’s because of one big team effort. As we have seen on these reality TV shows, everything can suddenly fall apart when everyone isn’t working together and respecting each others’ roles. Here are a few of the key players in a renovation team.

Tradies are your experts in the trade! Pulling together trusted and reliable tradies is crucial for a smooth operating renovation. Get recommendations on the best plumber or tiler in the area and always check their insurances and licenses. As seen on the TV renovation shows, contestants always ring around to get several quotes for any job to ensure they’re in the right ballpark when it comes to costing.

Designers are your go to for the look and feel of the place. Just like tradies, they’re the experts in the field, so trust their opinion when they say red and pink shouldn’t go side by side.

Suppliers will provide you with the tangible items to make your renovations happen, be it bricks, paint, plants, kitchen sinks etc. Suppliers are key personnel to the renovation team.

You are NOT the expert! Don’t get zapped like Paul did in season 1, episode 4 of The Block. Cutting corners will cost you money and time in the long run and even a trip to the hospital. The more an owner takes on the more stressful those larger scale renovation can be. DIY renovations may not necessarily be cheaper.

How Much Does It Cost To Remodel A Bathroom?

Average Cost of a Bathroom Remodel

The average bathroom remodel costs $10,670 Most homeowners spend between $6,065 and $15,278. You can spend as little as $3,500 to $7,000 updating the essentials in a small or medium-sized bathroom. On a large or master bath, you could spend $25,000 or more. Labor averages 50% of the total project price at about $65 per hour. Expect pricing to vary regionally up to 20% due mainly to labor. Material prices stay roughly the same across the country.

Estimating Bathroom Remodel Costs

Bathroom remodel costs run anywhere from $2,500 to $25,000. Large master baths in luxury homes might even hit or exceed $50,000. The typical homeowner will spend between $6,000 and $15,000 for a complete tear out and replacement of all walls, fixtures and appliances.

Labor will run you anywhere from 40% to 65% of your total project. Ranges depend on your location. While material pricing doesn’t change much from place to place, a higher cost of living means higher wages.

Determining your bathroom makeover budget can be tricky. Consider the following:

Room size.

Regional pricing differences. Expect to pay up to 20% more if you live in an area with high real estate prices.

Quality of materials. A fiberglass shower surround might run only $300. Custom tile work can easily hit $3,000+.

Changing the floor plan. Making your bath larger, like converting a half bath to a full bath costs an additional $5,000+.

Type of fixtures, appliances, counters and finishes you choose. Make a plan that includes both design and budget before choosing what to buy for your bath remodel.

Bathroom Remodel Material Prices

Materials for the average bathroom remodel run anywhere from $2,100 to $9,000. Understanding how those prices break down individually helps determine where best to invest your money and time.

How Much Does It Cost To Install A Window?

Window Installation Costs

Window installation costs $5,628 total, or between $2,952 and $8,759. Labor costs $150 to $800 per window, or about $40 per hour. A single window unit runs $300 to $1,200 for standard sizes. Custom and bay windows may cost $2,000 or more. Compare quotes from local window installers for the best price.

House Window Prices

Individual prices range from $85 to $2,500 or more with installation adding an additional $150 to $800. The price depends on several factors including accessibility and the total number in a project. Material type is the largest cost factor. On the lower end of the spectrum is a vinyl, single-hung, replacement unit. On the highest end of the price spectrum is a solid mahogany-framed, triple-pane, low-E picture style.

Window Costs for New Construction

New construction windows run anywhere from $85 to $1,400. Designed for new construction and during remodels where the stud-framing is exposed, they attach directly to the studs via a flange called a nail fin frame.

Window Prices by Size

There are hundreds of common sizes available, but brand, design and material play a more significant role in pricing. Unless you purchase a very large, pre-hung type such as a bay or picture style, size only impacts the material price, not installation.

Replacement Window Prices

Replacements run $200 to $1,300 depending on size, installation requirements and material. Specialty types, such as glass block and large picture styles, can run upwards of $2,500 or more. Replacing existing windows costs less than cutting walls for new ones.

How Much Does It Cost To Install Or Replace Countertops?

Countertop Estimator

Countertop installation costs $2,949 on average, with a typical range of $1,863 and $4,125. Homeowners usually pay $15 to $70 per square foot for the material and $10 to $30 per square foot for labor, for a total of $25 to $120 per square foot.

Countertops are a functional centerpiece in any kitchen, bathroom or bar area. When you choose materials for your home, it’s important to consider what they’ll be up against every day. In a kitchen, they need to withstand scratches, nicks and burns. In a bathroom, they will combat high moisture levels and frequent heat.

New Countertop Installation Costs

The expense to install a countertop averages around $3,000, including $10 to $30 per square foot for labor. Basic pricing depends on:

the materials you choose

whether an existing surface needs removal

whether you’ll need to resize to fit an awkward space

edging, grouting, staining and sealing

Talk to a contractor about all of the steps and costs involved in your project. A professional will be able to give you the most accurate quote

Countertop Prices Per Square Foot

At $10 to $30 per square foot, installation can represent as much as half the total expense. Countertop materials range from $1 to $190 per square foot, with an average of $15 to $70 per square foot. Types that cost more, such as stainless steel or marble, do not necessarily run higher for labor.

Labor Cost to Install Tile vs. Slab Countertops

Although there can be significant variation in labor expenses by material, slabs tend to cost less than tile. Installation for slab runs around $10 to $15 per square foot, compared to $20 to $30 per square foot for smaller tiles. Although bigger pieces are heavy and require extra care, pros can lay them faster.

How Much Does A Garage Door Cost?

Garage Door Installation Cost

Garage door installation costs $1,116 on average with a typical range between $738 and $1,496. A standard, single garage door ranges from $600 to $1,500 installed. A double car door averages $800 to $1,500 installed. Labor costs about $300 per unit, while the price of a new garage door is $300 to $1,100.

Pros tend to price these per project, which includes labor, the door, tracks and any hardware. Design and material might increase the overall cost but won’t affect how long the job takes or the labor needed. If you’re changing any structural parts of the garage or installing new electrical, you’ll need permits. Homeowners associations sometimes have strict requirements for materials and designs.

Garage Door Replacement Cost

Garage door replacement costs $600 to $2,750. Full replacements run the same as the average new installation. You might save some money if you use your old opener or rails. The following chart breaks down the individual prices of each item

Garage Door Replacement Cost Considerations

Whatever your budget, add 20% for overages and other cost considerations when either installing a new door or replacing the one you already have. Some common additions you’ll want to think about include:

Location: cost varies. If it costs more to live there, it’ll probably cost more for the door.

Removing and disposing: $25-$100. Often included in your quote.

Resizing the opening: $500-$5,000. Costs depend on structural needs. Simply adding height means removing, bracing and replacing structural elements that hold up the roof.

Hardware replacement: $50-$350. Hardware includes springs, hinges and bolts. Most hardware comes included in the estimate.

Materials: You’ll choose a new door from a wide variety of materials, styles, shapes and sizes, which varies widely in price.

Garage Door Replacement or Repair Cost Comparison

Garage door repairs run anywhere from $100 to $600 or more. Even at its worst, it’s 50% less to repair than replace. Actual costs depend on what you’re fixing.

Garage door repairs cost $150-$350.

Garage door opener repair costs $100-$300.

Garage door spring repair costs $100-$200.

Stainless Steel Kitchen Sink

BASIC RULES FOR KITCHEN SINKS

If the kitchen is the heart of the home, then the drains and pipes that bring us fresh, clean water and take away liquid waste, are just as surely the vital arteries and veins that keep things pumping.

And as with our own body’s fluid transport system, what gets into those ‘pipes’ really does matter. Just like blockages in our bodies, clogged, blocked or damaged pipes and drains in the kitchen can spell disaster for the overall functioning of the home.

Holiday rentals, commercial kitchens and workplace cafeterias often come complete with shiny, laminated sets of rules displayed near the sink for everyone to see. These rules are designed to keep areas safe, clean and in good working order for as long as possible. But when it comes to keeping things operating efficiently around the kitchen sink at home, it can sometimes be the absence of ‘rules’ and the bad habits we or our family/housemates have developed over time that bring us unstuck.

Be creative and write them on a chalkboard, paint and decorate your own ‘shabby-chic boho-styled’ kitchen rules board for a wall near the sink, or if your housemates aren’t great at subtle hints, make your own shiny laminated sign and stick it somewhere they just can’t miss.

Whatever way you choose to get your message across, making sure everyone in your household takes care with what goes down the drain and into your pipes can save a whole lot of inconvenience later on and the expense of calling a plumber.

Incredible Kitchen Sink Ideas and Designs

A kitchen sink is a necessity, so important that we easily forget about styling it. Every kitchen needs at least one sink. It provides a contained space for you to work with water while minimising the splatter and water mess. From washing food items, utensils and dishes, to organising and holding food to thaw, cool, dry and cook, the sink is an indispensable feature of the kitchen. Here are some incredible kitchen sink ideas and designs to inspire your next kitchen upgrade, renovation or new home kitchen design.

Modern Farmhouse

The classic charms of the farmhouse kitchen sink get a sleek and modern upgrade. This streamlined version of the rustic kitchen sink is made of stainless steel in light grey. The apron is smooth and fits perfectly with the classic and modern kitchen interiors.

Black Granite

This modern and luxe kitchen sink is also efficient and multi-functional. It is made of granite composite in minimalist matte black. The sink features a main washing basin, a small one for separating items and a drain for washed items. Sleek and innovative design.

Secret Compartments

This kitchen island sink comes with secret compartments. Very handy in managing clutter and keeping smaller items organised. You can use space for concealing the not-so-attractive items in the kitchen like dishwashing scrubs, detergent and sponges.

The Disappearing Sink

This kitchen sink can disappear when you’re done with it. Ideal for smaller homes or apartments, the disappearing sink can turn your kitchen island into a dining table fast and easy. It comes with a custom cover that you can insert over the sink when not in use.

Kitchen Tips: Must-Have Kitchen Organising Items At Home

There’s no doubt that an organised workspace is linked to work efficiency. A clean and sorted space makes our job quicker and easier. A clean and organised kitchen also motivates us to step into it with a grin on our face. To cut the long story short, cooking and other kitchen chores get so much easier if all the things are kept in the right space. Imagine cooking in a kitchen, where you can find all the herbs and spices near you! Stop dreaming and make it a reality. Here, we bring you some organiser options, which may help you to make the sorting job easier.

Container Set:

One of the first few things one needs to organise a kitchen is nice storage containers for all the dry food items including herbs, spices, biscuits, pulses etc. It not only makes the kitchen look neat, but also saves your cooking time.

Towel Hanger:

Kitchen towel lying haywire is a very common site in several households. This makes the space look unorganized and untidy. Hence, we bring you a towel hanger option that can be attached to your cabinet door to hang the towels neatly.

Pantry Storage Organiser:

If you think that putting the herbs and spices in dedicated containers is enough to make the kitchen look organised, then you are absolutely wrong. You also need to organise the containers properly. That job gets easier with a pantry storage organiser; it helps you to set the containers and jars properly at one place

Kitchen Sink Organiser:

The dishwashers play an equally important role in a kitchen. Hence, a dedicated space for the scrubs and the soaps is also much needed to make the kitchen look clean.

Why a Workstation Sink Will Be The Best Thing in Your Kitchen

What if adding a workstation sink could actually improve everything you do in your kitchen? You hear it all the time, but kitchens really are the heart of the home. We love designing and remodeling kitchens for our clients because it is a space we know they will use and appreciate every. single. day.

A beautiful space that is designed to add functionality will not only bring the client happiness each day when they use it, it can also add a lot of value to the home, which means a happier bank account in the long run!

What Is A Workstation Sink?

At a workstation sinks may look like your normal kitchen sink, but they are so much more. They actually offer the added benefits of specific accessories designed to increase their functionality.

Workstation sinks are a growing trend, and we are totally onboard! The benefits of adding additional workspace, along with useful accessories allows the sink to no longer just be a place for dirty dishes, It transforms it into a multi-functional space.

The common accessories included in many workstation sinks are: drying rack, colander, cutting board, and bottom grid. Each offering their own unique functions and benefits. Many styles of sink have a workstation option; from undermount, to drop in, to apron front, are all available depending on the preferred style for the kitchen.

Things in the Kitchen That Are Making You Sick

The kitchen is often called the heart of the home. It’s where we gather and prepare the food that keeps us well and healthy. However, as in other rooms of your home, there are dangers lurking in the kitchen that can make you sick. Some of the troublemakers can cause a few days of digestive upset but others can be deadly, especially to young children and to those with compromised immune systems. If you are feeling sick, it’s time to take a look around your kitchen and possibly change some habits.

One of the biggest health hazards in your kitchen is you and how you handle food. If food is not cooked and handled safely, bacteria can multiply rapidly, causing foodborne illnesses that can range from a few hours of digestive upset to death.

Are you guilty of any of these missteps?

Undercooking Foods: Foods should be brought to the proper temperature needed to kill bacteria. Runny egg yolks, sushi, or raw cookie dough are particularly dangerous for young children or anyone with a weakened immune system.

Leaving Leftovers at the Wrong Temperature: Improper food temperatures simply invite bacteria, yeast, and mold to thrive. Hot foods must be kept above 140 degrees F and cold foods should be stored below 40 degrees F. This includes foods that are being thawed or marinated. Never leave these foods out on the counter for extended periods. Thaw slowly in the refrigerator or more quickly in the microwave and use immediately.

Using Unwashed Produce: All fresh produce should be washed before eating or using in cooking to remove bacteria and pesticides.

Are Ceiling Stains A Sign Of A Roof Inspection

How long does it take to inspect a roof?

What is a roof inspection?

A thorough examination to determine the health and integrity of a roof. A professional inspector will look at surfacing material and inspect dormers, chimneys, gutters, flashing points and recommend any necessary repairs.

What is involved in a roof inspection?

A roofing inspector will climb up to the roof and locate the various dormers, chimneys, gutters, and any flashing points to see if they require remedial work.  He will examine the condition of the roofing surface material.  He will also inspect inside the house looking carefully at the eaves, interior chimney surfaces, fasteners, roof braces, and support material.

How long does a roof inspection take?

A general roof inspection will take from 45 minutes to several hours.

How should I choose a roof inspector?

Choose a licensed professional with a roofing certification. Get several quotes, and choose the one with the best reviews.  Or ask around for referrals from your broker.

When is a roof inspection needed?

Many roofers recommend two roof inspections each year. An inspection in the fall helps ensure that minor problems don’t become major problems under the pressure of rain, ice and snow, while a spring inspection helps evaluate any damage done during the winter that may prove costly following heavy spring rains.

Why Your Roofing Needs Inspecting

Your roofing needs to be inspected from time to time to ensure that it’s safe and that it doesn’t need to be repaired or replaced.

  • Fix  small problems before they cause bigger issues
  • Ensure that your roof is safe
  • Find out if you need to replace your roof
  • Ensure proper maintenance of your roof

The experts at Homestyle Roof Painters offer a variety of services to meet your roofing needs, including doing inspections.

This is a valuable way to protect your home and your family and take care of your house at the same time. How do you know if your roof needs to be inspected? Keep reading for everything you need to know.

Reasons to get a roof inspection

There Has Been a Big Storm

A simple rainstorm won’t necessitate a roof inspection, but a violent storm might. If there has recently been a lot of rain or other extreme weather, your roof could be damaged and you don’t know yet. Letting it go could result in more damage and leaks in your home. We can assess for damage and repair or replace parts that broken or missing so your roof is restored to its old condition.

You have a leak

If you have exhausted all other options, the leak is probably in the roof. Our leak detection service can identify the source of the leak.

You Need to File an Insurance Claim

If you need to file an insurance claim due to hail, rain or other damage, you will need to have your roof inspected beforehand. This process creates a detailed picture of what’s wrong with your roof so your insurance company can calculate the money owed to you for the claim. You can then use that money and we’ll replace or repair your roof quickly and efficiently.

You Want to Increase the Value of Your Home

A new roof can dramatically increase the value of your house, which is great if you plan to sell anytime in the next couple of years. At the same time, a new roof increases the curb appeal of your house and makes it more attractive for your own enjoyment or to attract future buyers.

You Might Need A Replacement If Your Roof Has Shingle Granules

Shingle granules are the tiny specs of rock and crushed up minerals that are embedded in the surface of a single shingle. As time goes on and roofs get older and older, a roof can start to get bare spots that cause these granules to become loosened and run into your gutters.

When looking for these granules, remember that they look like sand crystals and are darker because of the shade of the shingle. When these granules are lost, shingle decay and aging can speed up rapidly.

If this is allowed to happen, moisture will be able to seep into your home causing even further damages.

You Might Need A Replacement If Your Roof Has Buckling or Curling Shingles

When you have a roof that has buckling or curling shingles, it typically means that it is time for a new roof. The reason for this is because intense heat, moisture, and aging have taken its toll on the shingles, which causes them to warp or become unstable.

Another reason your shingles could be curled or buckling is because they were previously installed incorrectly. If this happens, it leaves them even more exposed to ice damage and wind, causing them to break off or crack.

You most certainly want to look into either a replacement or repairs if you notice any of this happening to your roof.

How long does a commercial roof inspection take?

You may be wondering; “How long will a roofing contractor be on my property?” For an average 20,000 sq. ft. commercial building, it takes approximately 30 minutes to 1 hour to perform a roof inspection.

A roof inspection can take shorter or longer depending on:

  • How many penetrations are the roof (each one needs inspected thoroughly)
  • How many roof sections there are (every section is inspected differently)
  • How many different types of roofs there are

Once the roof inspection is complete, then you sit back and wait for the report to come to you.

How long until I receive my commercial roof inspection report?

  • A roof inspection report is usually sent to the building owner in 3-5 days.

What will be included in the inspection report?

Inspection reports will include:

  • The deficiencies within your current roof system w/photos and clear explanations
  • What options you have in repairing your roof
  • A quote for the work proposed

How long does it take to inspect a roof?

Most roof inspections take between 45 minutes and 4 hours. Where on that range you land depends on:

  • square footage
  • ease of accessibility
  • roofing materials
  • Whether or not the attic is included in the inspection.

After the checkup, expect to receive the report within 7 days.

Exterior Residential Painting Employ Only The Best

Painter

What does a painter do?

A painter applies paint and other decorative finishes to interior and exterior surfaces of buildings and other structures.

Some of the main duties of a painter are to:

Prepare surfaces to be painted (includes scraping, removal of wallpaper, etc.).

Determine what materials will be needed.

Use, clean and maintain various equipment.

Supervise apprentices or other workers.

Provide estimates and invoices for clients

What are some health and safety issues for painters?

Painters can work at a variety of workplaces, construction sites, homes, etc. and face a constantly changing set of hazards. The hazards include:

Working at heights.

Ladders, platforms and scaffolds.

Working in confined spaces.

Risk of eye injury.

Slips, trips and falls.

Risk of injury from falling objects.

Exposure to moulds, fungi and bacteria.

Exposure to bird and rodent droppings.

Exposure to paint products, solvents, lead and other toxic substances.

Proximity to flammable or combustible materials.

Working in awkward positions, or performing repetitive physical tasks.

Standing for long periods of time.

Lifting heavy or awkward objects.

Exposure to heat and ultraviolet radiation.

Noise.

Stress.

Electrical hazards from working close to live electrical power lines or equipment.

Shift work or extended work days.

What are some preventive measures for painters?

Learn correct procedures for working at heights.

Select the correct ladder for the job.

Avoid awkward body positions or take frequent breaks.

Learn safe lifting techniques.

Know how to prevent injury from electrical hazards. Maintain safe distances from energized electrical equipment or utility lines.

Keep tools and equipment, and their safety features, in good working order.

Wear appropriate personal protective equipment and footwear.

Keep work areas clear of clutter and equipment.

Learn safety procedures for working in confined spaces.

Maintain good ventilation during painting.

Know how to prevent exposure to bird and rodent droppings.

What are some good general safe work practices?

Practice safety procedures for:

Working at heights

Working with asbestos contained products

Using ladders

Lifting

Repetitive physical tasks

Selection, use, maintenance and storage of personal protective equipment

Confined space entry

Follow company safety rules.

Learn about chemical hazards, WHMIS and MSDSs.

Know how to report a hazard

Follow good housekeeping procedures.

Painting Company Names: How I Found the Perfect Name for My Painting Company

I was in the same place as you six years ago when I started my painting company. I really didn’t care what the name was, I just wanted something that would bring in a lot of business.  In this post, I am going to walk you through my process of picking a name for my painting company

Putting my name in the business name – something like “Mike’s Painting”. Nice idea, right? Simple, easy to remember, and personal. But customers might hold the expectation that they would get to work with “Mike”. Given that I wanted to grow the business beyond myself, I didn’t want to give anyone that impression.

Choosing a descriptive name, like “Superior Painting” – With a name like this, the name could attract business throughout my entire service area and I could operate without customers expecting to work directly with me.

These names were OK, but none of them felt 100% right. They just didn’t hit me the right way.

So I came up with a list of positive-sounding words and tacked the word ‘painting’ on to the end of them:

Certainty Painting

Superior Painting

Assurance Painting

Evergreen Painting

Paint Doctor Painting

QualityPro Painting

Summit Painting

Questions You MUST Ask Your Painter Before Hiring Them

How to Hire a Painter – When referring or hiring a painter, there are certain questions you must ask yourself before hiring anyone.  When considering house painting in Toronto or anywhere else, it can be a scary process finding a reliable painter who you can trust.  It can be very daunting to have to find qualified local painting contractors and rely on them. Especially if they were never referred to you or you have never seen their work

Questions you MUST Ask Before Hiring a Painter:

A Written Warranty – Minimum 1 year warranty to cover all seasons of deterioration.

A Clearance Certificate from Workers Safety Insurance Board (WSIB)

If the painting contractor don’t have WSIB and a painter gets injured, then you and your house insurance are liable for this worker’s current and future wages as well as medical expenses.

Liability Insurance

Minimum $1 million liability but $5 million liability insurance preferred If an accident occurs (i.e. paint spill or damaged property), you are liable for your own property, unless you want to go through the hassle of legal measures.  This is good to have especially if the painting job size is less than the value of what can be damaged.

Years in business – Minimum 5 years of professional painting experience, but preferably over 10 years in the business.

References

Clients from within the past 1 year or more recent.

Past clients from 3-5 years ago.

Reputable references such as well-known commercial corporations

Criminal Record Checks

Hiring an Interior Painter needs more effort. Would you let a stranger into your house if there’s a 50/50 chance they have a criminal record?  Well without at least checking them, that’s what you are doing.

asking for their Clearance Badge that all employees should have if they have been checked.

Portfolios from previous jobs– Before & After photos are a great way to see results.

Do they have a Local business address or just a business card with a phone number?

Approximate starting and finishing times for the painting project – put it in writing on the property painting contract!

Quality of materials that are being used?

THINGS TO KNOW ABOUT COLOR PSYCHOLOGY

In daily life, are surrounded by thousands of different colors, each in their own right, impact mood in one way or another. Whether it’s the vibrant green of the fresh grass or the colorful leaves of autumn trees, each one emits energy and causes a different reaction in people. This is why the colors you choose for your walls will play a huge role in the atmosphere you have at home. These will reflect not only your personality and tastes but also the energy and vibe you want to create in the room. While some colors don’t necessarily match all interior decor styles, that shouldn’t stop you from experimenting with different hues that you wouldn’t normally use.

Start by Understanding the Basic Tones

The universe of paint colors is almost endless, and it is nearly impossible to make a quick and easy choice among them. In addition to important factors like temperature or intensity, each brand of paint will have custom versions of colors that will sometimes look similar when comparing swatches but will have a very different effect when applied to your walls.

Whites:

white has a vast and varied palette that will give a boost to rooms where you are looking to create this type of effect. Although white is all-purpose, it will be good to determine in advance whether you prefer a warm shade or a cool shade. Warmer whites are great for a relaxed and visually relaxing vibe, while cooler hues are best in rooms where you are looking to be more active and alert

Neutrals:

In addition to inspiring calm and relaxation, neutral tones like browns or beiges are perfect for people looking for more than just a white room, but who don’t want to use bolder shades. These hues will emanate down-to-earth energy and be a perfect match for your productive workdays.

Pale colors:

In the world of painting, each bright color inevitably has its diluted version, either pastel or simply paler. Just like neutral shades, this option will be perfect for people who are still hesitant to take the plunge to dark colors. Shades like powder blue, sage, pale yellow, or a subtle pink.

Handy tips and funny stories

It seems that even professionals can have a bad day painting. Over time have received various funny decorating stories and handy tips from trade painters, so have gathered together a selection for you

Look out!

Sometimes projects just don’t go according to plan as this painter tells. You’d think laying dropcloths out over a larger area would be the smart move but as Law can pretty much guarantee the only spot you don’t put the dropcloth is where the paint will always land

“One day I was working on a job in a really upmarket house, like everything was very expensive even down to the long haired white and grey fluffy cat, which was sleeping on the chair in the bedroom enjoying the sun.

It was just about smoko time and we had been called and told the brew was ready. As a workmate of mine turned around, he knocked the tin of paint off the windowsill he was painting and it landed just short of the dropsheet he had laid down under the window. The carpet had to be the most expensive carpet he had ever walked on, his first thought was, I’m up to be fired, the second thought was, who can I blame this on? Next minute, he grabs the ‘very expensive’ fast asleep long haired white and grey fluffy cat and swipes it through the paint on the floor, then yelled ‘bloody cat’, to which the owner comes rushing in and sees the paint on the floor, the cat covered in paint running off putting paw prints all over the rest of the carpet

Text checker

Remember the old days when didn’t have text messages? And now think how fast you can send off a flurry of texts to others. Of course, most of will have sent a text to the wrong person somewhere along the way, but perhaps not quite so spectacularly

Carpet Flooring Options

How do I deep clean my carpet?

If you want a clean and fresh-smelling carpet, you don’t need to hire an expensive professional carpet cleaner. You can deep clean your carpets yourself using either wet or dry methods. To begin, make sure that you’ve already vacuumed and spot-treated your carpet. You can use a carpet cleaner that will scrub the dirt out of the fibers using water and a special solution. If you do not want to wait for your carpet to dry, you can also use a dry cleaning solution, which you will simply vacuum up.

Preparing the Room for Cleaning

Pick up anything on the ground.

You will need to have the carpet completely clear before you start deep cleaning. Pick up any toys, books, papers, shoes, or other items from the ground. Clear away any large or visible debris or trash from the carpet, and throw it out.

Move furniture out of the way. You should try to have as much furniture moved out of the room as possible. Lift chairs, tables, TV stands, and other smaller items, and take them to another room. If you have large heavy items that are difficult to move, such as couches or bookcases, you should put small pieces of aluminum foil under their feet.

Vacuum the carpet first. Vacuum the entire carpet to get as much dust and dirt out as possible before you deep clean the carpet. Go over the entire floor, especially areas that were previously covered by furniture.

Pretreat stains. If there are any soiled or stained areas, try to get the stain out before you clean the whole carpet. Use a carpet cleaning solution, and spray it over the affected area. Wait for fifteen or twenty minutes. Blot the stain out with a damp cloth or sponge, but do not rub.

  • If you do not have a spot cleaning solution on hand, you can use shaving cream. Spray the cream onto the stain, and wait 30 minutes. Blot it away, and spray the spot with vinegar. Wipe away any leftover residue.
  • You can make your own spot cleaning solution by mixing 1/4 cup (75 g) of salt, 1/4 cup (100 g) of Borax, and 1⁄4 cup (59 mL) of vinegar. Put the paste on stained areas, and wait until it dries before you vacuum it up.
  • If you don’t have Borax, you could use baking soda or washing soda instead.

What You Need

Ingredients: Salt, borax and white vinegar.

Equipment: A vacuum and a carpet steam cleaner, don’t worry, I explain why we need the heavy equipment below.

Instructions

Start out with good old spot cleaning then move to the more heavy duty all over work.

1. Vacuum. Vacuum like you’ve never vacuumed before: go in 3 different directions and take your time. Get the dust, hair and particles out of the pile.

2. Mix 1/4 cup salt, 1/4 cup borax and 1/4 cup vinegar, then apply this paste to deep stains or heavily soiled sections of carpet. Allow the paste to sit on the carpet for several hours until it dries completely, then vacuum it away.

3. Start up the steam cleaner. Why are we using a steam cleaner you ask? I’ve looked into lots of options from dry chemical cleaning (vetoed because of the chemicals and what is left in the carpet) to steam cleaning and have decided that renting a steam machine is the best option because the chemicals are optional. Try to rent a new machine to increase efficiency and do a little pre-cleaning of the machine if it doesn’t come to you pristine.

4. Skip the carpet shampoo. Hot water can get most grime out of your carpet alone, just make sure you’re filling your machine with really hot water.

5. If you have especially soiled carpeting you can add 1 cup white vinegar to 2.5 gallons of water for very deep cleaning.

6. Most machines have 2 modes. First you depress a button and release the hot water and second you release the button and it sucks water back up. Spend 3/4 of your time on the second mode. Soak the carpet then go over it three or four times to dry the carpet as much as possible.

7. Steam clean the carpets a second time. You rented the machine for the day right? you might as well get your money’s worth and do 2 passes.

8. Let the carpets dry completely. Once they are mostly dry you can bring furniture back in but we usually put aluminum foil under the legs to avoid any stain bleeding onto the wet carpets. Then, let them dry all the way before you walk on them to avoid staining them again.

9. Finally, dispose of the water from the machine responsibly. Many places that rent out the machines will take the machine back full to avoid putting the chemicals from your carpet down the drain. Otherwise, call your local water treatment plant to enquire about how to dispose of the waste water.

How To Clean Carpet At Home: What Not To Do

Now that you know how to properly clean a carpeted floor, let’s talk about what not to do.

  • First and foremost, you shouldn’t go to town on your carpet with your vacuum’s beater bar on the lowest or hard floor setting. This may seem like it would get your carpet cleaner, but it can cause your carpet to look worn beyond its years. Over time, the fibers can fray, mat down, and fall apart.
  • Furthermore, avoid using any product on your carpet that isn’t designed for it. Even products that claim to be designed for all carpet may wreak havoc on your specific carpet.
  • In the worst case scenario, an inappropriate cleaner can cause delamination of the carpet backing, discoloration, or even melting of the carpet fibers. Therefore, the spot test is very important.
  • As a rule, a few things to keep away from your carpet are any products containing bleach, ammonia, acetone, certain oil-based solvents, oil soaps, furniture polish, waxes, and colorants, among other things.
  • Finally, the most common mistake made when cleaning carpet is oversaturating it with water. Whether you are spot cleaning or deep cleaning, this is one thing you should always avoid. Oversaturation can cause moisture to become trapped in the carpet and pad leading to mold, mildew, and even rot.

Over time, excessive moisture can also cause your carpet to pucker and ripple which requires professional re-stretching. Sometimes, the carpet becomes moisture-damaged beyond repair and must be replaced.

How to Clean Carpeted Stairs without a Machine

If you live in a multi-story house, you know how quickly the carpet on the stairs can get dirty. Most commercial carpet cleaners aren’t built to clean individual stairs. It means that to get the carpet on your stairs clean, you’ll have to do it by hand.

Natural Carpet Cleaner for Use Without Machine

  • 1 cup vinegar
  • 2 cups hot water
  • 2 teaspoons table salt
  • 15 drops lavender oil

You’ll need to make or buy a carpet cleaner. To make a homemade carpet cleaning solution, combine the hot water and vinegar in a large spray bottle. Add the lavender oil and salt to the container. Replace the cap and shake well.

To remove dirt and debris from your stairs, use a stiff brush and scrub the stairs, starting from the top stair and working your way down. Brushing the stairs will help to get rid of any stubborn dirt that a vacuum cleaner can’t remove. Next, you’ll want to clean the loosened dirt with a vacuum. Again, start on the top step and work your way down.

Next, you’ll want to take the cleaning solution and spray each stair liberally. To get a deep clean, use a scrub brush, and scrub each stair. Allow the carpet to dry, then vacuum the stairs to remove any residue.

Manually Clean the Carpet with Baking Soda

Baking soda is a miracle product because it can be used for everything from baking to cleaning your carpets. It is an inexpensive solution that is environmentally friendly and will tackle stains and odors in your carpet. Cleaning your carpet with baking soda is simple.

Just sprinkle a generous amount of baking soda over your floor, or directly on a stain. It works similarly to other homemade floor cleanerand DIY carpet stain remover recipes.

With a spray bottle, lightly mist the soda with hot water. Let the mixture sit for at least three hours to allow it to soak up and absorb the dirt and odors. After the area has dried, use your vacuum cleaner to vacuum up the baking soda.

Factors To Keep In Mind When Choosing A Quality Kitchen Remodeling Services

Things to Remember When Remodeling Your Kitchen

Today more than ever, homeowners are taking on home improvement projects to renovate and remodel their homes. Many people simply enjoy the challenge of working on their own home and creating something that is uniquely them. Some do it to make their home more beautiful and comfortable. Whichever type of person you are, you should be aware that casting a keen eye on the value of your real estate and making certain improvement can boost the value of your home when it becomes time to sell your home.

Counters

One of the first things people look at in a kitchen is your counter tops. Take a close look at your counter tops. Are they in good shape? Do they have nicks and cracks? Is the grout coming out or stained? Some projects can be simple to do and bring those old counter tops back to life. If they do need to be replaced you should go with granite, if possible. Granite countertops are something homebuyers love to see and often just being able to add “granite countertops” to your listing has shown to sell a home 38 days sooner and for 4 percent more money.

Cupboards

If counters are the first thing people notice in a kitchen, there is no doubt that cupboards and sockets are next. Cupboards today come in so many different styles. If you are looking to replace those rundown, old cupboards, take note that today’s trend is to hide appliances in a cupboard. To do this effectively you need to plan for electrical sockets to be installed inside where your appliances can be plugged in.

Adequate lighting

If there is an accident in a house it will most likely happen in the kitchen. That really isn’t surprising with hot ovens, sharp knifes, cupboard doors, so having good lighting is important in any kitchen. Ceiling lighting gives you a general lighting and illuminates the entire space. Where pendant lights give you a move focused light for areas like over islands where you may work most. Under-cabinet lights not only illuminate other workspaces but also ensure those dark corners are now bright.

Appliances

There is no question that appliances are where you can easily sink some money and quickly add value. Buyers just don’t like having to update appliances themselves. Often replacing just one appliance isn’t an option because suddenly the older ones don’t look so nice any more. Appliances are expensive, but you can shop for sale pieces, but make sure they all coordinate and are the same quality level, regardless of how much you’re spending.

Things to Avoid When Doing a Kitchen Renovation

If you’re planning to finally take out your measuring tape and get to renovating your old worn down kitchen, then there are certain things that we believe you should keep in mind. Renovation is not an easy task, and there are an infinite amount of factors that can go wrong when you are stripping away at the wallpapers.

Be careful when picking materials

We cannot stress this point enough, really. When out picking your materials for your kitchen renovation project, looks and aesthetics should not be the only factors you take into consideration during purchase. Sure! A designer kitchen that screams ‘style’ and ‘elegance’ can indeed be the hot topic of conversation among all your social circles. However, if the material is fragile, it will start to fall apart in just a few days time, and your entire investment will go down the drain.

A lot of the amateur DIY enthusiasts go for limestone as their material of choice as they look quite attractive. But, what they don’t realize is that limestone is prone to water rings, and will dampen much of the aesthetics over time. Marble, on the other hand, is prone to etching and staining, while countertops made out of recycled glass can chip very easily.

Cheap appliances are a no go

Any form of home space renovation, especially kitchen renovations, can get pricey. Whether you are hiring professional agencies for the job, or just rolling up your sleeves and driving the faucets in yourself, your savings will still take quite a hit.

Every job has a rhythm

By rhythm here, we mean a productive and efficient workspace where the flow of the job will not be hampered by external distractions.

KITCHEN REMODELING TIPS

home on the market next spring, and I am already combing the local real estate listings in hopeful anticipation of a new home! Real estate experts often say that kitchens and baths sell homes. If this is true, then it is no wonder that many of the homes I am viewing are still on the market. From what I have seen so far from the available listings in our price range, a kitchen remodel will most likely be in our near future.

Kitchen decorating is an extremely personal process and no matter what your budget, every family deserves a beautiful and stylish kitchen. From cabinet color, to countertop material, to appliances, to pulls, finding a wide array of affordable and modern styles for a kitchen remodel can be a daunting process. I have designed, remodeled, and redecorated several kitchens over the course of homeownership and have found Lowe’s Home Improvement to be an excellent resource for my kitchen needs

Your first task is to determine the scope of your project. How much of your existing kitchen can be saved and how much needs to be replaced? If you are able to work with your existing cabinets, you will save a bundle! Likewise, if you are able to work with the existing plumbing and electrical layout you will cut down on your installation costs and be able to devote more of your budget towards fun upgrades. A helpful formula to determine your maximum kitchen remodel budget is to spend no more than 5%-15% of your total home value

Knowing your decorating style will help you plan more easily for your kitchen remodel and will help you convey your ideas to designers and contractors. Don’t worry if you aren’t able to come up with a one-word label for your kitchen style! More importantly than being able to put a label on your style is being able to communicate to others exactly what kind of kitchen you are hoping to create

Choosing cabinets, paint colors, back splashes, countertops, hardware, and lighting are what make my heart go all-a-flutter! However, the most important aspect of any kitchen remodel is the flow, functionality, and layout of the kitchen. It might sound silly, but I highly recommend “playing pretend” in your soon-to-be-remodeled space! When I designed our kitchen and our neighbor’s kitchen, I did some rough space planning using spare 2×4’s on the floor so that I could get a physical sense of flow issues–such as how far away the sink would be from the stove

THINGS THAT YOU NEED TO KNOW ABOUT A KITCHEN RENOVATION

Think you’re ready to create the kitchen you’ve always been dreaming about? You’ve spent countless hours perusing magazines, blogs and Pinterest looking for designs to use. You think you have saved enough for your kitchen renovation. You’ve even found a reputable contractor. Does this mean that it’s a green light for the kitchen remodel?

Set a budget

The quickest way to waste money with a renovation project is to proceed without a set budget. Before even proceeding with the planning and design stage of the project, you should have a rough idea of how much it will cost you and how much you truly can afford.

Consider the timelines

Simply put, kitchen remodels can leave your home in a big mess. If you think that it will take just a few weeks to complete a project, your contractor can give you a realistic timeframe. In turn, this will allow you to make the necessary arrangements, like renting a storage space.

Plumbing works can complicate the project

You might have a specific idea of the look that you want to achieve for your kitchen. However, pursuing that idea can turn even the simplest projects into complex ones, especially if it involves additional plumbing works. Again, talk with your contractor so that you’ll know how much that idea will cost you, and find out about cheaper alternatives you can try.

Pay attention to codes and regulations

Some types of works involved in a kitchen remodel require securing the pertinent permits from the local government. Make sure that you do not cut corners. Otherwise, you can undermine the value of your home when you are planning to sell it or refinance it. Take note that lenders and potential buyers want remodeled homes which comply with prevailing building codes.

Things to Consider Before a Kitchen Renovation

You’ve made the decision: it’s finally come time to renovate that old, worn-out kitchen your family has made do with over the years. You know it will take a bit of investment, and you want to make sure it is done correctly so you can enjoy your new space for years to come.

things to consider when planning a kitchen remodel. Following this guide will help you avoid problems and ensure that your dream kitchen becomes a reality.

Hire a Pro – Having an experienced professional firm like Builders on your team will not only save you time, but could also save you expensive repair work when do-it-yourself goes wrong. Kitchen renovations involve dealing with natural gas, electric, and water lines that could seriously damage your home or even injure you if not professionally installed.

Prioritize Your List – Your budget can help determine what is most important to you. Primary decisions to make up front are things like layout, infrastructure (flooring, framing, windows, plumbing, electrical), cabinetry and countertops. If you have sufficient budget after these selections have been made, you can move onto secondary considerations like new appliances, fancy faucets, elegant backsplashes or eye-catching light fixtures. If your budget doesn’t allow these items up front, they’re much easier and cheaper to swap in later than something on the primary list.

Open or Closed Floor Plan? – There are benefits and drawbacks to an open or closed design that you can read more on here. Careful thought should be given to choosing what works best for your kitchen.

Choose the Right Countertop – Kitchen countertops are very personal choices, and the perfect one can bring everything together. There are dozens of options to choose from (as you can tell in part 1 and part 2 of our Choosing the Right Countertop blogs), including what type of edge you want. Do you go with eased, bevel, or bullnose, and have you considered the ogee? (That’s a name for a fairly common molding that has the profile of an elongated S.) If you need help deciding, can run you through the ins and outs of each.

Choose the Right Floor – Just as with the countertops, there are dozens of flooring options available to you as well. Helpful Flooring Buyers Guide can help you with that. Some are easier to clean, others are gentler on dropped dishes, and of course, some cost more per square foot than others. You’ll probably see one type of flooring jump to the top of your list as you learn what’s available.

What To Packing Services For Travelling

What to do when movers are packing your stuff

Having analyzed the pros and cons of Move Yourself vs. Hiring Movers, you have made the smart decision to hire professional packers and movers to take care of your house move for you. After all, it’s the choice that makes a lot of sense when you’re moving long distance, when you can’t persuade your friends to help you out, or when you just don’t wish to go through all the stressful hassle of moving on your own.

And with Moving day almost knocking on your front door, you may start to wonder what to do when movers arrive. What to do during your full-service move is definitely an important question to answer now that professionals are taking over your residential move:

Should you have done something before movers arrive?

Should you offer to help your movers? And if yes, how?

Should you just stand aside and let movers do what they do best?

Be prepared for your packers and movers

Before you can worry about what to do while movers are packing up your things, you need to make sure you are ready for the arrival of the pros

Here are the major things you have to do to prepare for movers and packers:

Have only items worth packing. Inventory your home before your packers come and leave only the things that you must take with you at all costs. Yes, get rid of unwanted stuff to cut your moving expenses and save time, money and space in the long run. How to get rid of unwanted stuff?

Defrost and clean up your fridge. You can’t do this task on Moving day itself because, even if you choose to clean your fridge after the move, the defrosting process alone can take approximately 8 hours

Pack up essentials boxes. It’s a good idea to start preparing your boxes of absolute essentials a few days prior to Moving day. Important items such as documents, valuables, prescription medicine, and a number of other life-savers should never leave your side anyway. What to pack in an open-first box?

Help packers be more productive in their work

Your packers and movers are already here – what should you do NOW? Just before they start work – packing up your home and loading them into the moving van, there are a few significant things you should do to guarantee a quick and effective packing job.

Packers and Movers

dedicated to easing your home or office relocation through providing assistance on everything from packing your possessions, arranging storage (if necessary), unloading at your destination and installing your belongings in your new premises

Offering competitive prices, no task is too big or small for our professional team. thrive on making life easier for our customers – absorbing all stresses and making your relocation an exciting prospect.

Packing up and relocation of business premises

When the time comes for your business to relocate to new premises, Moving will take care of all the hard work so you can focus on continuity of business operations with the minimum of disruption.

will assist you – or take the lead – in safely packing all furnishings, stock and equipment, including computers, tools and desks. By using the correct packing materials and techniques, we eliminate the risk of breakages.

Packing up and moving your home

Finding a new home should be an exciting time in your life – not a stressful one. Let Moving take care of all the hard work so you can focus on getting your family settled and comfortable in new surroundings.

Things to Expect from a Moving and Storage Service

Around 12% of people in the US move each year. While some of those tens of millions of people will do it all on their own, some will use a moving and storage service. It’s a little nerve-wracking to trust all of your worldly possessions to the care of complete strangers. While you can replace clothes or bookshelves with ease, heirlooms and mementos often prove one-of-a-kind.

Pre-Move

A professional moving service will want to schedule the move well in advance of the move date. This helps them ensure they’ll have trucks and movers available. You should start calling around at least 2 months ahead to get quotes and lock in a service by around 6 weeks out.

Most movers offer packing services. While you aren’t obligated to use them, professional packing service benefits include:

reduced risk of personal injury

reduced risk of property damage

less stress from not having to pack

The Move

On moving day, the movers pack and load your belongings onto the truck, or just load the belongings you packed. They handle the transport to either your new home or to a storage facility. If you need to stay in an apartment until you finish closing on a new house, for example, you’d want to store most of your belongings. Once your house is ready, the movers retrieve your belongings from storage and deliver them.

Climate Controlled Storage

Some of your belongings, like ceramic dishes, can tolerate getting stored without climate control. Many of your belongings, however, might suffer in the high heat, extreme cold or drastic changes in humidity. Wooden furniture can warp, split or twist under those conditions. Books will grow mildew or mold. Old photographs will fade as the paper and ink deteriorate.

Packing Services

Whether you’re moving house or putting your belongings into storage, packing materials will be an essential.

In order to keep your items in a safe and secure condition, you need to make sure they’re carefully wrapped. Not only will this minimise breakages, but it’ll also help to protect your belongings from dust, the atmosphere and other potential damage.

Quality packing materials

Removals and Storage has a range of packing materials available for purchase, ensuring you’ll never run out of the essentials again.

Conduct a pre-move survey with you to establish the details of your removal and at this point, we can offer a range of packing materials ready for the big day. Cartons are ideal to stock up on for your larger items or thing that can be moved in bulk.

offer a range of different shapes and sizes, so whether you want to pack your entire wardrobe in one, or want to take your favourite lamp with you, a carton will give you that convenience. Bubble wrap is something that any good house mover can’t get enough of. You can use it to wrap everything from crockery to shoes and it offers an extra layer of padding just when you need it most. Without a good amount of bubble wrap, you can occasionally expose your goods to higher chance of wear and tear during the course of your remove; hence why Britannia will always recommend its use.

Choose your own packing items

You can take a look at our pricelist for further information, but you’ll find that have a wide range of materials available including mattress covers and parcel tape. even stock marker pens, which are often forgotten about until it comes time to mark up your boxes. You can access price list using the link below; Packing materials price list

Professional House Packing Services

To make moving easier, All Purpose Removals offers home packing services to assist with packing your belongings such as precious crockery, glassware and paintings. expert packing teams are trained to ensure your packing is carried out safely and efficiently. skilfully load your personal items into packing boxes, saving you both time and effort. packing teams carry high-quality boxes and packing supplies and are available to pack as little or as much as required.

Unpacking Services

Have you ever moved house to find there are still boxes waiting to be unpacked weeks – or even months – later? Unpacking can be the most daunting part of the move. unpacking services help to speed up the unpacking process and eliminate stress on your end.

Removalist Assisted Unpack

Your removalists will unpack your belongings from their boxes and set them on benchtops and flat surfaces. then remove all the boxes and packing supplies so you can easily put your things away without the clutter of packing boxes getting in the way. provide tailored unpacking service packages that range from a total unpack of the kitchen through to an unpack and removal of all your cartons.

Full Valet Unpack

Valet Unpacking service is the ultimate choice for move-in simplicity. Once your removalists have moved your furniture and boxes into the new house, unpacking team get to work immediately so by the end of the day, it already feels like home.

liaise with you throughout the unpacking process to ensure everything is put away exactly where you’d like it. also set up the bedrooms, make the beds, and go over every detail so certain your home is ready for you.

Key Requirements In A Wedding Videographer

How can I improve my videography skills?

Want to create a polished, professional video that impresses your audience? It’s easier than you might think.

Achieving a professional look is more about your technique than your tools, so you don’t need to drop a fortune on expensive equipment – chances are good that you can make great videos with whatever you’ve got right now, just by paying attention to a few key details.

Tips to Make Your Videos Look More Professional

Find your Fellini.

Someone on your staff has shot and edited video. One great tip in spotting these folks is to seek out the glowing Apple logo on devices, then ask the owner about video editing. As soon as you identify your subject, tell him or her that they now specialize in Video Production. It’s important enough, now and in the future, to have a full-time expert.

Invest in gear.

Like anything, the difference between pro and amateur is noticeable. The good news is that for under $2k you can get a (deductible) DSLR camera and external mic/lav mic that will open up new frontiers of production value.

Figure out what you’re trying to say and to whom.

There are two questions to ask when beginning to plan for video production: What’s the message and who is the audience?

Plan your shoot

Whether you’re making a feature film, shooting a music video, or documenting a family documentary, the idea is the same: plan it out and stick to the plan.

  • Consider the following:
  • Work with a script.
  • Calculate your shots.
  • Budget the necessary time.
  • Prearrange cast and crew.

Shoot to edit

Remember to shoot your movies with variations of the scenes you plan to use. There’s a misnomer that suggests shooting as much footage as possible, so you have a lot to put together later. Not the best plan. It will take you a long time to make sense of it.

Instead, try to capture the necessary shots with the appropriate variations of camera angle, focal length, and camera-to-subject distance.

For each scene, consider the following variations:

  • Vary the width of shot. Wide shots give context.
  • Medium width adds perspective.
  • Tight shots add emotion.
  • Hold each shot. Whether you need two seconds in your movie or two minutes, always shoot the scene much longer than you anticipate on using it.
  • Vary your angles. Break up shots by placing the camera up high or down low.
  • Establishing shot. Be sure to shoot a strong opening shot for the film and for each key scene.
  • Limit each take. This is when rehearsing comes in handy.

Use Plenty of Light.

Lighting makes a huge difference in the quality of a finished professional video, so make it one of your top priorities during filming. If you don’t use enough properly-placed light, your video will probably look amateurish, even if it’s great in every other way.

The sun is one of the best light sources for video. If you’re filming in natural light, do your best to get your footage in the morning or evening, when the light is softer. Midday light coming from straight overhead can cast harsh shadows on your subjects, while morning and evening light is more flattering. If you do have to film in the middle of the day, try to do so on a cloudy day, or find a shady area for softer light.

Use a Clean Background.

Be deliberate about the background you use for filming. Nothing looks less professional than a messy or distracting background. One easy way to get a professional look for your video is to use a solid-colored background. A wall, a bedsheet, or a large sheet of backdrop paper are all good options. Make sure your subject stands several feet away from the backdrop to avoid casting shadows on it.

Keep Your Editing Simple.

Trying out different effects can be fun during the video editing process, but don’t go too crazy. A simple, clean editing style generally looks most professional.

A few things you should be sure to do during the editing stage include:

  • Using noise cancelling to clean up any background noise.
  • Adjusting the lighting a little if you need to.
  • Cutting out awkward pauses and silences.
  • Adding background music and transitions.

Learn to Color Grade

As film crews are continuing to shrink and roles continuing to merge, a good cinematographer in today’s multifaceted environment needs a good understanding of color grading — if not how to double in that role altogether. If you think about it, it really makes sense for a DP to know how an image is going to color in post and how to shoot intentionally to prepare for those results.

Use Different Aspect Ratios

Another way to get a cinematographer out of his or her comfort zone (which is important for growth), is to practice shooting in different aspect ratios. A good cinematographer should have a comprehensive understanding of what it takes to shoot in everything from a 1:1 box to 2.35:1 cinemascope. A DP will have a major say in what aspect ratio is right for a project and will make their selections and recommendations based on what the story dictates.

Be cognizant of sound quality.

Don’t come off as an amateur with poor sound recording quality. Use lapel or lavaliere microphones — both of which are hands-free — when shooting sit-down interviews, or use microphone and boom setups for bigger shots. If you’re filming a video with a smartphone, you can purchase microphones that fit into the phone’s headphone input to quickly and easily improve sound quality.

Obey the rule of thirds.

The rule of thirds involves splitting up your shot into thirds, horizontally and vertically, and framing your subject off-center. It creates movement and life in your shot the way a straight-on, centered shot wouldn’t.

Use background soundtracks.

Light background music can cover any ambient sound and provide tone and emotion to your video that words and images otherwise can’t. You can find royalty-free stock soundtracks that you’re allowed to use on sites like AudioMicro — make sure you’re not using songs that are licensed, or else it could result in your video getting taken down.

When You Need An Immigration Lawyer For Your Green Card

How do I start an immigration letter?

If you are writing a reference letter for an immigrant, then one must be clear as to what information the person requesting the letter actually needs.

  • Talk to the person requesting the letter and find out the important details: why they want to live here, what they can offer, experiences, etc. The more specifics, the better.
  • Introduce yourself in the letter and include how long you’ve known the person, in what capacity and what your relationship is with that person.
  • Point out the person’s qualities, character traits, strengths and so on. Talk about the person’s work ethic, their background as it relates to the application, anything that Immigration might have questions about that you can address and provide insight to. For instance, if the person suffered trauma or abuse in their country and they’re still dealing with it, talk to how they are coping. If they are suffering nightmares or PSTD or physical symptoms, point those out.
  • Provide a strong recommendation.
  • Provide your name and contact information.

Who to consider for writing a reference letter?

Some of the individuals who might be fit to provide such a reference are people close to the requester, people, who can provide specific narratives and direct instances to help the claim for the moral character of the immigrant. Some of the best candidates are employers, landlords, teachers, a church member, relatives and friends who are already citizens of the country in question.

The more emotional impact the immigrant has had on the reference writer’s life, or vice versa, the greater the chances of the applicant’s success. However, if you are facing removal or detention, letters of support from your children will provide you with a strong case if they are applicable. Although family members will be willing to offer some glowing references, it’s preferable to ask someone who’s not related to recommend you.

Preparing to Write the Letter

Understand the kind of immigration proceeding. The first step in writing the letter is to find out what kind of proceeding the letter applicant is involved in. For example, reference letters may be used during immigration deportation or removal proceedings. The letter may also be used as part of a person’s application for naturalization. Other reasons for a letter include:

  • To prove a relationship, such as a bona fide marriage
  • As confirmation of employment or residence
  • As evidence of abuse (emotional or physical)
  • To confirm a credible fear of persecution held by a person seeking asylum

Talk to the requestor.

You should feel free to ask the requestor to put together a list of points they would like you to highlight in the letter. For example, the requestor may want you to share an experience working on a specific project, their passion for U.S. history, or specific personal anecdotes.

  • Additionally, you may also ask the requestor for a resume or other background information. You can use this information to guide the writing process.

Find samples.

You can find examples of immigration reference letters on the internet using a basic search. Be sure to revise whatever sample you find to fit your particular purposes. You must convey sincerity and credibility in your letter.

Here are some tips and guidelines on how to properly write an immigration reference letter:

1. Use Appropriate Introductions

It’s simply not enough to just write a quick, haphazard letter in this case. The reference letter needs to be strong and include key details in order to be effective.

First of all, in needs to have basic information about yourself and explain the relationship between you and the applicant. Begin the salutation with, “To Whom It May Concern”. Next, introduce yourself in the beginning of the letter by providing your own immigration status and name.

Explain how you came to know the said applicant. If you hold a respected position in the community, business, or military, be sure you include this important information in the letter.

2. Talk About The Applicant’s Character

In most cases, the heart of any letter is considered the most important. Provide key examples of the applicant’s integrity and good character. Clearly point out the different character traits the applicant has, such as a desire to help other people in need.

Next, include details that support that claim with specific details of certain events whether they’re past or present, like volunteering their time to feed hungry kids.

Also, it’s advisable to convey stories of how eager the applicant is to help out a friend or neighbor who could use a hand or how much they care about their family.

If the applicant’s petition is denied and may therefore potentially lead to substantial hardship, such as both financial and emotional turmoil, include that information in the letter as well.

3. Include Other Aspects If Applicable

Depending on the applicant’s personal situation, it may be a good idea to discuss the applicant’s family. In the U.S., family ties are especially important and perhaps it’s a strong reason why they’re seeking citizenship.

If the applicant has a particularly strong bond with their spouse and/or children, go ahead and describe it in the letter. Again, provide specific examples if possible. In order to further provide credibility, make sure that you describe your longtime or frequent contact with the applicant.

If you’re a former or current employer of the applicant, offer some background on them in terms of your working relationship, such as where and when they worked for you along with their duties and job title at the time. Include examples that illustrate and positively reflect their work ethic, skills, and integrity.

4. End The Letter By Complimenting The Applicant

Finish your immigration reference letter with a sincere compliment and also let the reader know that it’s okay to contact you if they need more information. Therefore, be sure to list all your contact information including your phone number, email, and mailing address.

Even though it’s not absolutely necessary, it’s always best to get the letter notarized as this will verify your identity as well as your signature.

Child Custody Rules and Immigration Laws

The state family court and the immigration court are completely different systems that sometimes deal with the same cases. Each court makes its own decisions based on different laws, rules and objectives, producing some inconveniences in the moment of deciding a case. A non-citizen often must obey contradictory rulings from both courts.

Obtaining Child Custody

When a couple with children has recently divorced or separated, they usually try to fight for the right to custody of their children. The family courts make those decisions which are mostly based on the parent’s physical, monetary, and mental conditions to raise their children and the bonds between the choldren and their parents. The specific laws dealing with child custody are defined according to the state where the child and parents live, but in most states, even a non-American citizen has the right to fight for the custody of his child. The family court takes into account the conditions of a non-citizen, but in most cases, it will give a non-citizen at least the right for child visitations, the right to see and spend time with the child and it will also probably rule for child support.

Types of Child Custody

There are various types of child custody based on the time a parent will spend with the child and monetary support, such as joint custody, sole physical custody, joint physical custody, sole legal custody and joint legal custody.

In any of these cases there are privileges for the parents and also responsibilities. If a non-American-citizen receives any of these types of custody, it means she also needs to share in the related responsibilities.

Joint Custody and Sole Custody

If a non-citizen has sole physical custody of the child, which means he has total custody over the child, he has the right to take the child back to his country with him should he be deported.

If a non-citizen has joint custody of the child, she has to share the custody with the other parent, who is probably a citizen. In such a situation, the non-citizen can not legally take the child out the country.

Posted inLegal